When Gizmo asked me to write an entry for this new blog, How To Break Stuff, I thought, finally! I've been breaking stuff for years! However, two new hobbies are riding bikes really hard, and fixing stuff (though I've done a fair share of breaking stuff in my attempts to fix it).
Given this combination, here's a quick how-to and list of resources for winterizing your bike, rated by number of dollar signs, which is roughly how expensive it will be to do or to buy material for.
$$$ - If you've got a steel frame, a good investment is a treatment with JP Weigle's Framesaver. Take your bike to a bike shop. They'll strip it down and spray this stuff inside it, completely coating the innards of the frame tubes. It will offer very good protection against rust. If you've got an aluminum frame, this is of no concern for you – aluminum does oxidize, but it forms its own protective layer, whereas steel just rusts. How do you tell what material your bike is made of? Well, steel frames usually have round tubes, and aluminum frames will have oval or funny-shaped tubes, which are large compared to steel tubes. Look on the seattube (the part of the frame triangle that the seatpost sticks in to) – there's probably a tubing sticker, and if it says "chromo" or "chromoly" then you've got a steel frame. This might cost you $50.
$$ - clean and lube everything you've got. Bike shops sell chain cleaners, which are little devices that you fill with degreaser (Simple Green is a good, cheap one) and run the chain through a few times - or, you can just do your best with a spray bottle, a rag, and a toothbrush. Remove ALL the existing lubricant (a very good thing. Crud and sand and grit sticks to the lube and has the effect of sandpaper on your chain, gears, and derailleurs, which will reduce your efficiency and wear them down, causing shifting problems). So, clean your chain and all your cogs and chainrings, let them dry, and then apply a new coat of lubricant (do not forget this step). I recommend Rock N Roll Gold, which is super, but any thick lubricant will do you well, especially wax-based lubricant. This might cost you $20 or a bit more, for supplies.
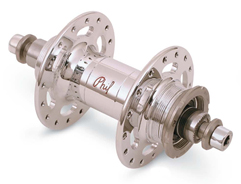
$ - grease everything on your bike. Phil Wood makes the best grease out there, but I also like Slick Honey. Anyway, here's what grease does – it forms a watertight seal between two pieces of metal. It prevents them from corroding to each other. It prevents rust. It also lets you tighten screws or bolts to the appropriate point (it's counterintuitive, but true). So, arm yourself with a set of allen keys, and take your bike apart, clean all screw/bolt threads, and regrease them. Pay attention to: the bolts for your stem and handlebars, and your seattube (this should be greased thoroughly – a major source of frame damage is getting a seatpost seized in the seattube!). $10 for grease, more for tools.
$$ - it's also a good idea to overhaul your hub bearings, bottom bracket, and headset, but this requires some special tools, special know-how, and some experience. Basically: any time you have moving parts on a bike, friction is reduced by a set of ballbearings between the moving part and the non-moving part. It's tough to overhaul these, because you have to re-set the tightness so that it's not lose at all, but not so tight that it reduces the efficiency. Some parts have disposable/replaceable "cartridge bearings" that you just pop out and pop a new set in. $10 for grease, and definitely more for some more specialized tools.
$$$ - While www.sheldonbrown.com and www.parktool.com/repair both have some helpful advice for some more advanced work, this should be part of any bike shop's tune-up/overhaul. If you take your bike to a shop for an overhaul (which will also include tuning your brakes and derailleurs), make sure to check to see if they'll do this. Cartridge bearings are usually well-sealed and don't need to be replaced, but loose-ball bearings should be cleaned and re-packed with new grease. Usually $60-80 for a shop overhaul.
(no money) – clean your bike! Clean it after you ride it, after you get it wet, and especially after you ride in the snow, because you'll pick up a lot of salt. Why is this bad? Remember that chemistry experiment in high school that you missed cause you got stoned in the bathroom? No? Go figure. Anyway, water plus salt plus steel (remember the quick lesson about steel up above?) = RUST, which weakens your frame and your parts. Furthermore, sand plus drivetrain (chain, cogs, derailleurs) = a noisy, poorly operational power/shifting system.
After your sloppy winter ride, wipe the whole thing down. Get all the wetness off of it. Make sure to wipe down the chain and to try to get any crud out of the gears. Take out your seatpost and clean it – lots of grit gets in here, so be sure to regrease it! In fact, many people overhaul their bike after each messy ride. It helps in eliminating the squeaks, moans, groans, and other awful sounds that result from a dry, rusting bike.
(no money) – store your bike inside! The weather is bad for the bike and there are lots of indoor, space-saving options. Just do an internet search for bike hanger.
This is all really do-able. Once you take the power of fixing and maintaining your ride in to your own hands, there's nothing stopping you from getting where you want, when you want. But, you ask, why not just put the bike away for the winter? Because, I respond mischievously, because you know that long night when it first snows and everybody is outside? Yes? Because that's a terribly fun night to ride your bike.